Tuesday, June 26, 2012
Making Old New
I love overalls but I hate how stiff the jean ones are for my baby. I found some soft Carter's ones at a gently used kids sale for $2.50 but they had a tacky bear on the front of them. Decided to pull out some scraps and make a unique pair of overalls for my lil' man. Not sure if I'm finished yet. May put a little green cuff on the bottom of the legs...
Caterpillar Birthday Continued
Hungry Caterpillar Birthday Banner |
Hungry Caterpillar Birthday |
Thursday, June 21, 2012
Very Hungry Caterpillar 1st Birthday
Getting crafty for my son's big day. So far I've made very inexpensive party hats, a paper caterpillar display, and did the invites.
Party Hats
Materials: Regular Cheap Party Hats (any style or theme), Colored Felt, Hot Glue, Pom Poms
Found some regular cheap party hats on clearance for less than a dollar. Purchased different color felt (25cents a piece or less). And a bag of PomPoms (2.99 minus a coupon).
Step 1: Unroll one of the party hats and use it as a pattern to trace out on your felt.
Step 2: Cut the felt (following the lines you traced of course)
Step 3: Glue (I used some spray glue as well as the hot glue, but all you really need is hot glue
Step 4: Glue a Pom Pom on top
Caterpillar
Materials: green circular tissue paper decorations and one red one(chinese lanterns would also work), purple, yellow, green felt scraps, popsicle sticks (I used bamboo skewers), hot glue
Step 1: Cut out eyes, ears, and nose
Step 2: Glue skewers or popsicle sticks to purple ears (I put felt over the back of the skewer as well so it still looks pretty from behind. Glue yellow and green eye pieces together. Glue all your pieces to the red head.
Step 3: Hang them up in a row
Invitations
I bought the invitations on clearance last year (I'm embarrassed to say i bought them before my son was even born). But you could always make some on the computer or buy some of Etsy I'm sure. I used different colored Flair Pens to address them. Made the invitee's name look like a caterpillar complete with purple ears and then addressed in all different colors.
Monday, June 11, 2012
Cards for Dad
Friday, May 18, 2012
Happy Dad Day Gift Topper
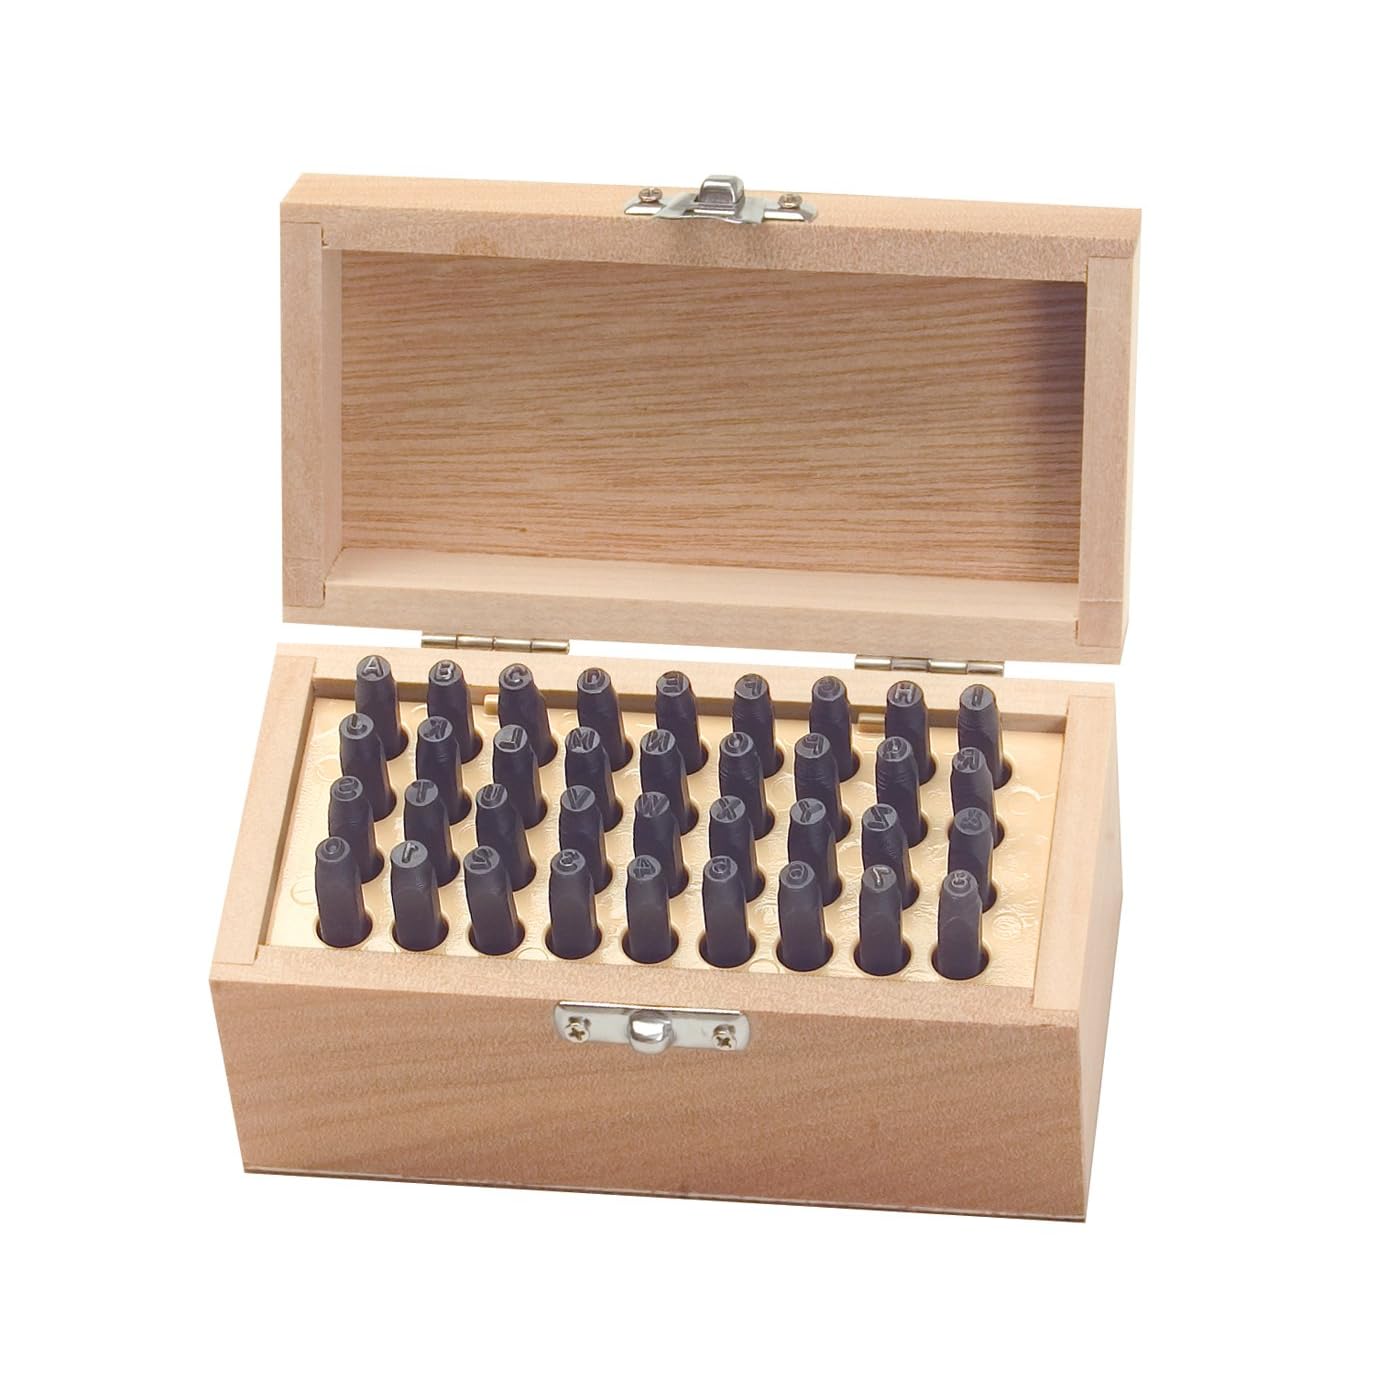
Made this little gift topper out of washers and a bolt from the garage! Super fun and cute. All you need is a hammer and a stamping set. I got mine off of Amazon but I know they sell them at Harbor Freight for about five dollars.
Important Tips!
-Don't try this inside. Too easy to damage something (like your floors or table).
-I found hammering on the concrete was the easiest.
-Place a cutting or self healing mat under your washer to prevent the concrete from scratching or indenting the backside of your washer
Happy Dad Day! |
Tuesday, February 7, 2012
Making Elmo Cupcakes
Step 1- Prepare the eyes. Pipe black frosting onto white melting chips (available at craft stores in the baking dept). I used a tube of Wilton black frosting after being disappointed with the results of the Betty Crocker black gel icing tube (difficult to spread, result was small black dots that made my Elmos' pupils look a bit dilated).
Step 2- Prepare the mouths. Twist Oreo cookies apart and cut with a flat bladed knife. Be prepared for them to crumble instead of cut smoothly. We went through quite a few cookies to get our needed allotment of mouths.
Step 3- Prepare the noses. Perhaps the best part of this venture was getting to eat bags of Peanut and Almond m&ms to secure a few orange Elmo noses. Enjoy!
Step 4- Frost your cupcakes red. I used Wilton red cupcake spray since I'm not a fan of the taste of red died icing. I made homemade buttercream frosting. Dabbed the knife up and down to create a furry effect. And sprayed them cakes red!
Step 5- Right after frosting stick your eyes, noses, and mouths on before the icing begins to dry.
Step 6- Watch your child's eyes light up when she sees them!
Subscribe to:
Posts (Atom)